

Recipe: Simple Crusty Bread
- Apr 14, 2020
- 8 min read
Updated: Oct 13, 2022
Simple Crusty Bread is exactly what it says. A very simple bread recipe that makes a wonderfully tasty homemade bread in a few hours.
This recipe makes three loaves of bread that you can bake immediately or keep the dough in the fridge for up to 2 weeks. You don't need any special tools, no special ovens or bread machines. Just flour, salt, water, yeast and a little time.
The loaves didn't quite come out perfect in this video, but that's ok, that's part of baking, things don't always work out perfectly. But they still taste delicious!
This recipe is from the New York Times and I highly recommend you get a subscription to access their full Cooking section. https://cooking.nytimes.com/recipes/1018203-simple-crusty-bread
Prep, Cook, Servings
Prep: 15 min. 3-5 hours rest. 30 - 45 min baking.
Servings: 3 loaves
Ingredients
3 cups lukewarm water
1 1/2 tablespoons instant yeast
1 1/2 tablespoons salt
6 1/2 cups unbleached all-purpose flour, more for dusting
Cornmeal or wheat bran, as needed for the pans.
Instructions (from the NY Times)
In a large bowl or plastic container, mix yeast and salt into 3 cups lukewarm water (about 100 degrees). Stir in flour, mixing until there are no dry patches. The dough will be quite loose. Cover, but not with an airtight lid. Let dough rise at room temperature 2 to 5 hours. Unless you're in a rush, let it rise the entire 5 hours!
You can bake at this point or refrigerate, covered, for as long as two weeks.
When ready to bake, sprinkle a little flour on dough and cut off 1/3 of the dough with a serrated knife. Turn dough in hands to lightly stretch surface, creating a rounded top and a lumpy bottom.
Put dough on a pizza peel or board sprinkled with cornmeal; let rest 40 minutes. Repeat with remaining dough or refrigerate it.
Place broiler pan on the bottom of the oven. Place baking stone on middle rack and turn oven to 450 degrees; heat stone at that temperature for 20 minutes. If you don't have a baking stone, use a heavy pan like a cast iron pan. I used an enamel-covered cast iron dutch oven.
Dust dough with flour, slash top with a serrated or very sharp knife three times. Slide onto stone. Pour one cup hot water into broiler pan and shut the oven quickly to trap steam. Bake until well browned, about 30 minutes. In the video I omitted the water to create the steam.
Cool completely.
Cooking Notes
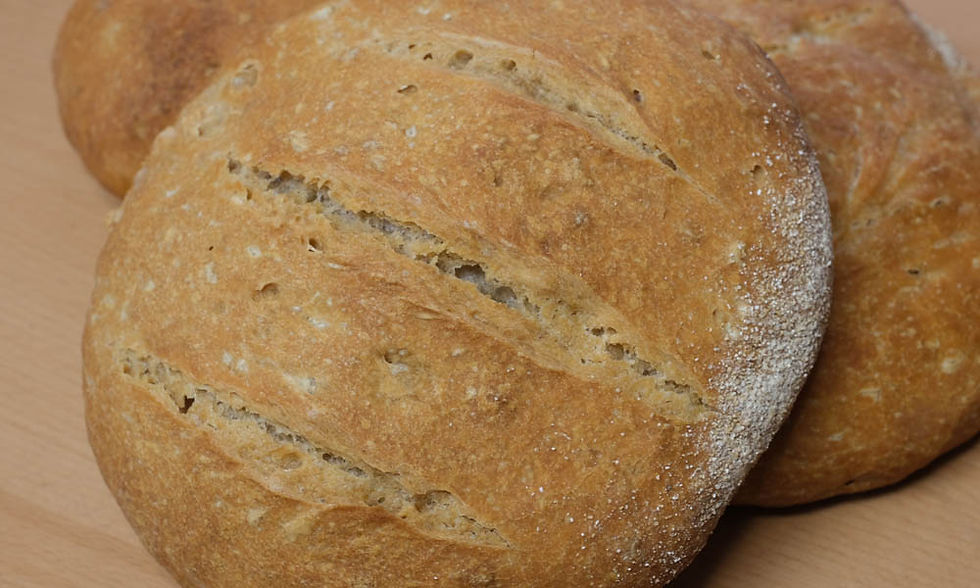
In the video, you'll see my bread is more like a disk than a loaf. The yeast was either close to expired or already expired so it did not rise as much as it should have. But that goes to show, you don't have to be perfect to enjoy great bread!
Full Video transcript. Apologies in advance for typos.
Walter
Folks, welcome back to Where's Walter. In this episode we are making simple crusty bread.
Walter
Simple, crusty bread. Four ingredients. I got flour. I got yeast, I got water and I got salt. That's it. No special ovens, no special pan, no special anything. Just those four ingredients, a really hot oven and a little bit of time. Now this recipe comes to us from the New York Times, highly recommend a subscription, they got a ton of good recipes on there. Now this is a plain bread, but if you'd like to go ahead and add a little flavor to it, you could throw some garlic powder in, some chili powder, some chili flakes, things like that. Just mix it in with the flour before you put it all together. Okay, let's get started. First thing you do is you put the water in the big bowl and I'm using this big bowl because you know if you've never made bread, the dough is going to expand. It's going to get much, much larger. So even though it's going to look small in the beginning, there needs to be room to grow. All right, one and a half tablespoons of yeast, which is really a tablespoon and a teaspoon. So we're just going to sprinkle that around. Now what the water does, it essentially wakes up the yeast. So the yeast is a living organism, and it's dormant. Basically this warm water is now going to wake up the yeast. So we can create the gases, which is going to create all those lovely holes and pockets in our bread. And then one and a quarter, one and a half teaspoon of salt. We like more salt, though. About one and a half teaspoons.
Walter
You might think that's a lot of salt. But keep in mind, there's a lot of flour that's going to be coming in here. Now the next step is to add the flour. But before we do that, I want to make sure that that yeast is really waking up. So I'm going to use my little whisk here and just kind of gently, very gently, just kind of push this around. You see we're getting some bubbles forming. It's kind of almost making a little cloud up here. This is something that you really should do with the kids. If you've got kids in the house, go ahead and make some bread with the kids, show them how easy this really really is. Okay, let's start adding the flour. We don't want to add it all in at once. So we're just going to add it into batches. Use a wooden spoon, you can use, this is a nice silicon paddle, just basically going to mix this in. You don't want to really stir the heck out of it. You can see I've actually got a KitchenAid sitting off here to the side. So if I had that running, I would just go ahead and have that running at a nice slow speed. But this is so easy, you can just go ahead and mix it up. Just trying to incorporate it in there and not worried about bringing it together as a ball. Just want to make sure that the flour is really incorporated into the dough and go ahead and use my hands a little bit just to incorporate it in. I'm not really kneading. I just want to make sure that all of that flour is picked up by the dough. The dough is very sticky and wet and I'm just going to make sure that all of that flour gets in there. And there you go. That's it, you just made bread dough. Now what we're going to do, we're going to cover it with plastic, but we're not going to make it completely airtight. That's per the instructions. And there we go. I've got a little gap over here to let air in. You've got to let it sit for two to five hours. Unless you're in a rush, let it go ahead and do the full five hours, because the longer it sits, you know, the more gases are going to develop more, you're going to get all those lovely little pockets and stuff inside the bread. So let it go for the five if you've got the time. It's been five hours and check out the dough. Look at that. It really rose up. Smells great. Now at this point, we're ready to start baking or if you want to go ahead and throw this in the fridge you can keep it in the fridge tightly wrapped for up to two weeks. Now it's about 9:30 at night at this point, so I'm not going to bake this now. I'll see you in the morning. So full disclosure. it's actually been five days since you last saw me, you know life kind of gets in the way, so this has been in the fridge for five days. Take a look here. Man, it smells great. Smells like bread. Okay, so the first thing I'm going to do is go ahead and scrape this out and get it on to a little board here that I've got floured up, scrape it gently. I don't want to break up all the bubbles, no kneading, no pressing down on the dough, just scrape it out. There we go. The instructions actually say to go ahead and cut this into thirds with a serrated knife. So I've got my bread knife here. I'm just going to go ahead and give this a little cut, right about here. The flour on the top with flour on my hands and gently pick this up. And I'm just going to kind of shape it into a ball without squeezing it. Just kind of stretch it over itself. Just trying to create a smooth ball on one side. Not saying I'm doing the best job. But hey, I'm a home cook, not a professional cook. There. I've got kind of a stretchy ball with some bumps on the bottom. Got a tray right here with cornmeal, and I'm just going to go ahead and set this down. So now we're going to let this rest for 40 minutes and while that's happening, then turn the oven on 450. The instructions say that you can use a pizza stone. So if you have one of those, you can put that in the oven before you turn it on, let it warm up with it. I'm actually going to use my grandmother's old cast iron enamel covered cast iron dutch oven. A little trick I saw on the Chef show with Jon Favreau on Netflix, where he baked the bread inside a covered vessel like this and then uncovered it at the end, so we got a really good bake inside and then you get that really good crusty bread on the outside. So I'm going to go ahead and throw this in the oven and warm it up with that 450 oven. Remember to put some gloves on before you pull that out, that's really hot.
Walter
You can put a little cornmeal inside the pot just make sure the bread doesn't stick to the bottom. This bench scraper makes it a little bit easier to get it up off the tray and into the pot. There we go. We want to cut three slashes in the top either with a serrated knife or a sharp knife. This knife is not as sharp as I thought it was, it doesn't matter, still gonna bake fine. Now we're going to go 450 degrees for 30 minutes and see what we got. This one and I threw a second loaf in while we were at it.
Walter
As you can see, not bad. It's not, it's not hollow yet. I'm not hearing it be hollow. Here's the one I did that wasn't covered, still not a hollow sound. So while the color is very, very pretty, I'm gonna go ahead and throw it in for at least another 10 minutes, I'm going to leave it uncovered. So I added another 10 minutes to it. So, I did the original 30 with the lid on and then I did an additional 10 and actually so this is the one that I started covered and this is the one that wasn't covered at all during the entire baking process. This one actually popped up a little bit higher than that one. So they came out a little bit flatter than they have in the past. Usually they poof up just a little bit more. But you know what that's part of baking. Doesn't come out perfect every time but you know what? They smell delicious. Let's see. Let's see what happens here. Whoo that is crusty.
Walter
Oh, not bad. You know what, that probably could have baked another, oh, 10 minutes at least, it's actually still somewhat moist in the middle. This is what I said. It doesn't come out perfect every time and our oven really bakes differently every single time. But you know what I'm going to do? Throw this in the toaster, and it's going to be great. Now this is the one that I bake inside the container. Let's see if it's any different. Wonderful crust on the outside. Let's see what we got.
Walter
Oh, that's definitely a little bit better baked. Still could have gone a little bit longer. So our oven is a little bit on the cool side. But hey, let's see how it tastes. Oh, yeah. Mmm. Good. It's good. Okay, could've baked about another 10 minutes. So that's what happened with baking, you know, sometimes it doesn't always come out exactly perfect, especially when you're working with your home ovens. But you know what, it still tastes great. It looks great. It's going to make amazing sandwiches. So if you like what we're doing here, please subscribe to the channel and click that little bell icon to get notified every time we upload some more deliciousness just for you. Thanks for watching. We'll see you next time.


Comments